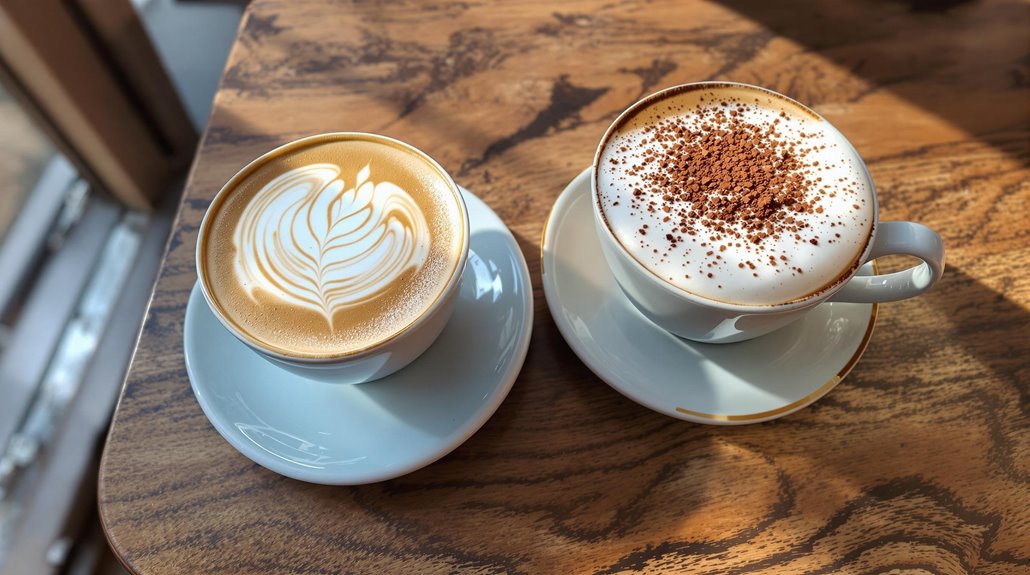


When you're looking to elevate your morning ritual, mastering the art of latte creation can be quite the rewarding endeavor. You might be wondering how to achieve that beautiful design that turns a simple cup of coffee into a canvas. It all starts with understanding the importance of steamed milk and the nuances of pouring techniques. But before diving into the details, you'll want to contemplate what tools you need and how to avoid common pitfalls that can sabotage your efforts. What comes next could change your coffee experience entirely.
Key Takeaways
- Use whole milk for a creamy texture, and steam it to 150-155°F (65-68°C) for optimal sweetness and microfoam quality.
- Practice pouring techniques by tilting the cup at a 30-40 degree angle, filling it one-third to half full with steamed milk.
- Focus on keeping the spout close to the coffee surface during the second pouring phase for detailed designs and control.
- Avoid large bubbles by maintaining steady flow and temperature control while steaming the milk; this ensures silky microfoam.
- Utilize tutorials and feedback from peers to enhance your skills, and document your progress for continuous improvement.
Importance of Steamed Milk
Steamed milk plays an essential role in creating stunning latte art that impresses both visually and in taste. The texture of your steamed milk is vital; it should be creamy and velvety, free from large bubbles that can ruin your intricate designs. When you use whole milk, you'll often achieve the best results due to its higher fat content, which enhances both the flavor and appearance of your latte.
To create perfect steamed milk, mastering proper steaming techniques is key. A consistent whirlpool motion integrates the milk with the espresso, elevating the overall quality of your drink. Aim for a temperature between 150-155°F (65-68°C) when steaming. This range helps maintain the milk's natural sweetness and ideal texture, making it more conducive for latte art.
Ultimately, the quality of your steamed milk can make or break your latte art experience. Investing time in perfecting your steaming skills will not only enhance the visual appeal of your lattes but also enrich your tasting experience. Remember, great latte art starts with great steamed milk!
Understanding the Pouring Phases

When it comes to crafting beautiful latte art, understanding the pouring phases is vital. The pouring process consists of two main phases: mixing steamed milk with your shot of espresso and then creating the art design itself. In the first phase, fill your cup one-third to half full with steamed milk. Tilt the cup at a 30 to 40-degree angle and pour the milk hard onto the espresso. This technique effectively combines the milk and crema, forming a solid base for your design.
During the second phase, keep the spout tip close to the coffee surface and raise your pitcher about 10 cm to create a thin stream. This positioning is critical for achieving the fine detail in your design. Use a gentle wiggling motion while pouring to introduce design elements, but make sure your hand remains steady for symmetry.
Mixing Techniques for Success

To achieve stunning latte art, mastering the mixing techniques is essential. Start by filling your cup with steamed milk, using about one-third to half of its capacity. This solid base is vital for creating depth in your latte. When you pour the milk into the espresso, hit the espresso hard to blend the milk with the crema effectively. This not only enhances the flavor but also improves the overall appearance.
Tilt your cup at a 30 to 40-degree angle during the pour. This angle promotes better mixing of the layers and helps achieve the right milk texture. Hold your milk pitcher steadily to control the flow, ensuring a smooth pour that eliminates large bubbles for a refined finish.
After pouring, gently swirl the mixture. This technique helps to blend the crema color, providing a striking contrast for your latte art design. By focusing on these blending techniques, you'll be well on your way to creating latte art that's not only visually appealing but also flavorful, elevating your coffee experience at home.
Pouring the Design

When you're ready to pour, keep the spout of your pitcher close to the coffee surface for a smooth flow. Use a gentle wiggling motion to craft intricate designs like hearts or rosettas, and maintain a vertical axis for symmetry. Remember, taking your time will help you achieve a polished and appealing presentation.
Spout Positioning Techniques
Mastering the art of spout positioning can greatly elevate your latte art skills. Begin by keeping the spout tip of your milk pitcher close to the coffee surface. This allows for smooth, controlled pours that enhance your design's precision. Utilize spout angle adjustments to direct the flow of milk, ensuring you maintain a vertical axis while pouring. This technique promotes symmetry and balance in your final creation.
Experiment with pitcher height variations to achieve different effects. Elevate the pitcher at least 10 cm above the surface to produce a thin stream of milk, perfect for detailing your artwork. When you're pouring, take your time to refine your design, aiming for a polished finish rather than rushing through the process.
Be mindful of surface tension effects as you pour. The closer you get to the coffee, the more you can manipulate the milk's behavior, creating beautiful patterns. Each adjustment you make influences the final outcome, so practice these spout positioning techniques to enhance your latte art. With patience and precision, you'll transform your coffee creations into stunning works of art.
Wiggling for Design
With your spout positioning refined, you can now focus on adding intricate designs to your latte art through a wiggling motion. Begin by keeping the spout tip of your pitcher close to the coffee surface to guarantee a smooth and controlled flow. As you start pouring, incorporate wiggling techniques with your wrist to introduce beautiful pattern variations, whether aiming for hearts, rosettas, or other designs.
Maintain a vertical axis during the pour to achieve a symmetrical and balanced look. Once you're ready to create detailed elements, raise the pitcher at least 10 cm above the cup to form a thin stream. This height helps you execute finer designs that stand out beautifully against the espresso.
Maintaining Pour Stability
To maintain pour stability while crafting your latte art, focus on the consistency of your milk flow as you pour. Start by positioning the spout tip of your pitcher close to the coffee surface, which allows for a smooth and controlled pour. This technique helps you achieve the delicate precision necessary for intricate designs.
Utilize gentle wiggling motions while pouring to enhance your latte's visual appeal. Remember to maintain a vertical pouring axis—this is essential for achieving consistency and symmetry in your design. If you need to add height, raise the pitcher at least 10 cm above the cup. This creates a thin, steady stream of milk that defines your patterns beautifully.
Steady hand positioning is vital; it helps you manage pour control techniques effectively. Take your time as you pour; rushing can compromise the quality of your art. By focusing on these elements, you'll refine your designs and produce a professional look that impresses. With practice, your pour stability will improve, and soon you'll be crafting eye-catching latte art right from your home kitchen.
Essential Tools for Latte Art

Creating stunning latte art at home requires the right tools to guarantee success. First and foremost, a high-quality espresso machine with a steam wand is essential for crafting the perfect espresso base and steaming milk. To achieve ideal milk texture control, a stainless steel milk pitcher is a must-have. It allows you to manage the flow and texture when pouring, which is critical for creating intricate designs.
For precise temperature management, a thermometer or milk frothing thermometer will help make sure your steamed milk reaches the perfect range of 150-155°F (65-68°C) without scalding. This temperature is crucial for achieving a creamy microfoam that holds its shape.
When it comes to serving, a sturdy coffee cup or latte bowl with a wide surface area enhances visibility and offers ample space for your artistic creations. Finally, consider pitcher selection tips; a small, pointed spout pitcher is particularly beneficial for precision pouring, enabling you to draw detailed patterns on the coffee's surface. With these latte art essentials, you're well on your way to impressing friends and family with your coffee creations!
Training Tips for Improvement

Mastering latte art requires consistent practice and a few strategic training techniques. To start, use practice methods that minimize waste, like pouring water mixed with a drop of detergent. This simulates milk's viscosity, letting you focus on your pouring technique without wasting ingredients. You can also substitute espresso with diluted cacao powder; it mimics the texture and helps refine your skills.
During your practice sessions, focus on mastering hand positions and movements. These elements are essential for developing muscle memory and control. Begin by filling your cup one-third to half with milk, tilting it at a 30 to 40-degree angle. This depth enhances the mixing process, allowing your designs to flourish.
Slow, deliberate movements are important. Rushing can compromise the quality of your latte art, so take your time as you pour. Utilize visual references, like tutorials or images of professional latte art, to guide your practice. Incorporating feedback loops, whether from self-assessment or peer review, will help you identify areas for improvement. With dedication and the right techniques, you'll elevate your latte art to the next level.
Common Mistakes to Avoid

Even with dedicated practice, it's easy to fall into common pitfalls that can undermine your latte art efforts. One major mistake is steaming your milk too hot. If the temperature exceeds 65°C, you'll end up with large bubbles that ruin the texture essential for beautiful designs. Instead, focus on temperature control to achieve that silky microfoam.
Another common mistake is rushing the pouring process. Take your time; practicing patience allows you to control your movements better and create more intricate designs. Additionally, don't forget to swirl the milk and espresso before you pour. Neglecting this step can lead to poor contrast in your latte art, making your designs less visible.
Lastly, make sure that the spout tip of your milk pitcher stays close to the coffee surface while pouring. This helps maintain control and creates even designs. By avoiding these common mistakes, you can elevate your latte art game considerably. Remember, each cup is an opportunity to improve, so embrace the learning process and enjoy your journey into the world of latte art!
Disclosure: As an Amazon Associate, I earn from qualifying purchases.


